生成的音频效果链接
腾讯云 GPU地址
https://ide.cloud.tencent.com/dashboard/gpu-workspace
先新建一个 space
流程参考
conda环境
conda create -n fish-speech python=3.10 -y
conda activate fish-speech
torch 依赖安装
pip install torch==2.3.1 torchvision==0.18.1 torchaudio==2.3.1 --index-url https://download.pytorch.org/whl/cu121
libsamplerate 和 fish-speech 依赖
前面这两步骤和csdn 文章里面是一样的, 直接使用我本地已经编译好的文件压缩包 上传到并解压

解压命令如下
tar -zxvf fish-speech.tar.gz
tar -xf libsamplerate-0.2.2.tar.xz
压缩包地址
fish speech压缩包
libsamplerate压缩包
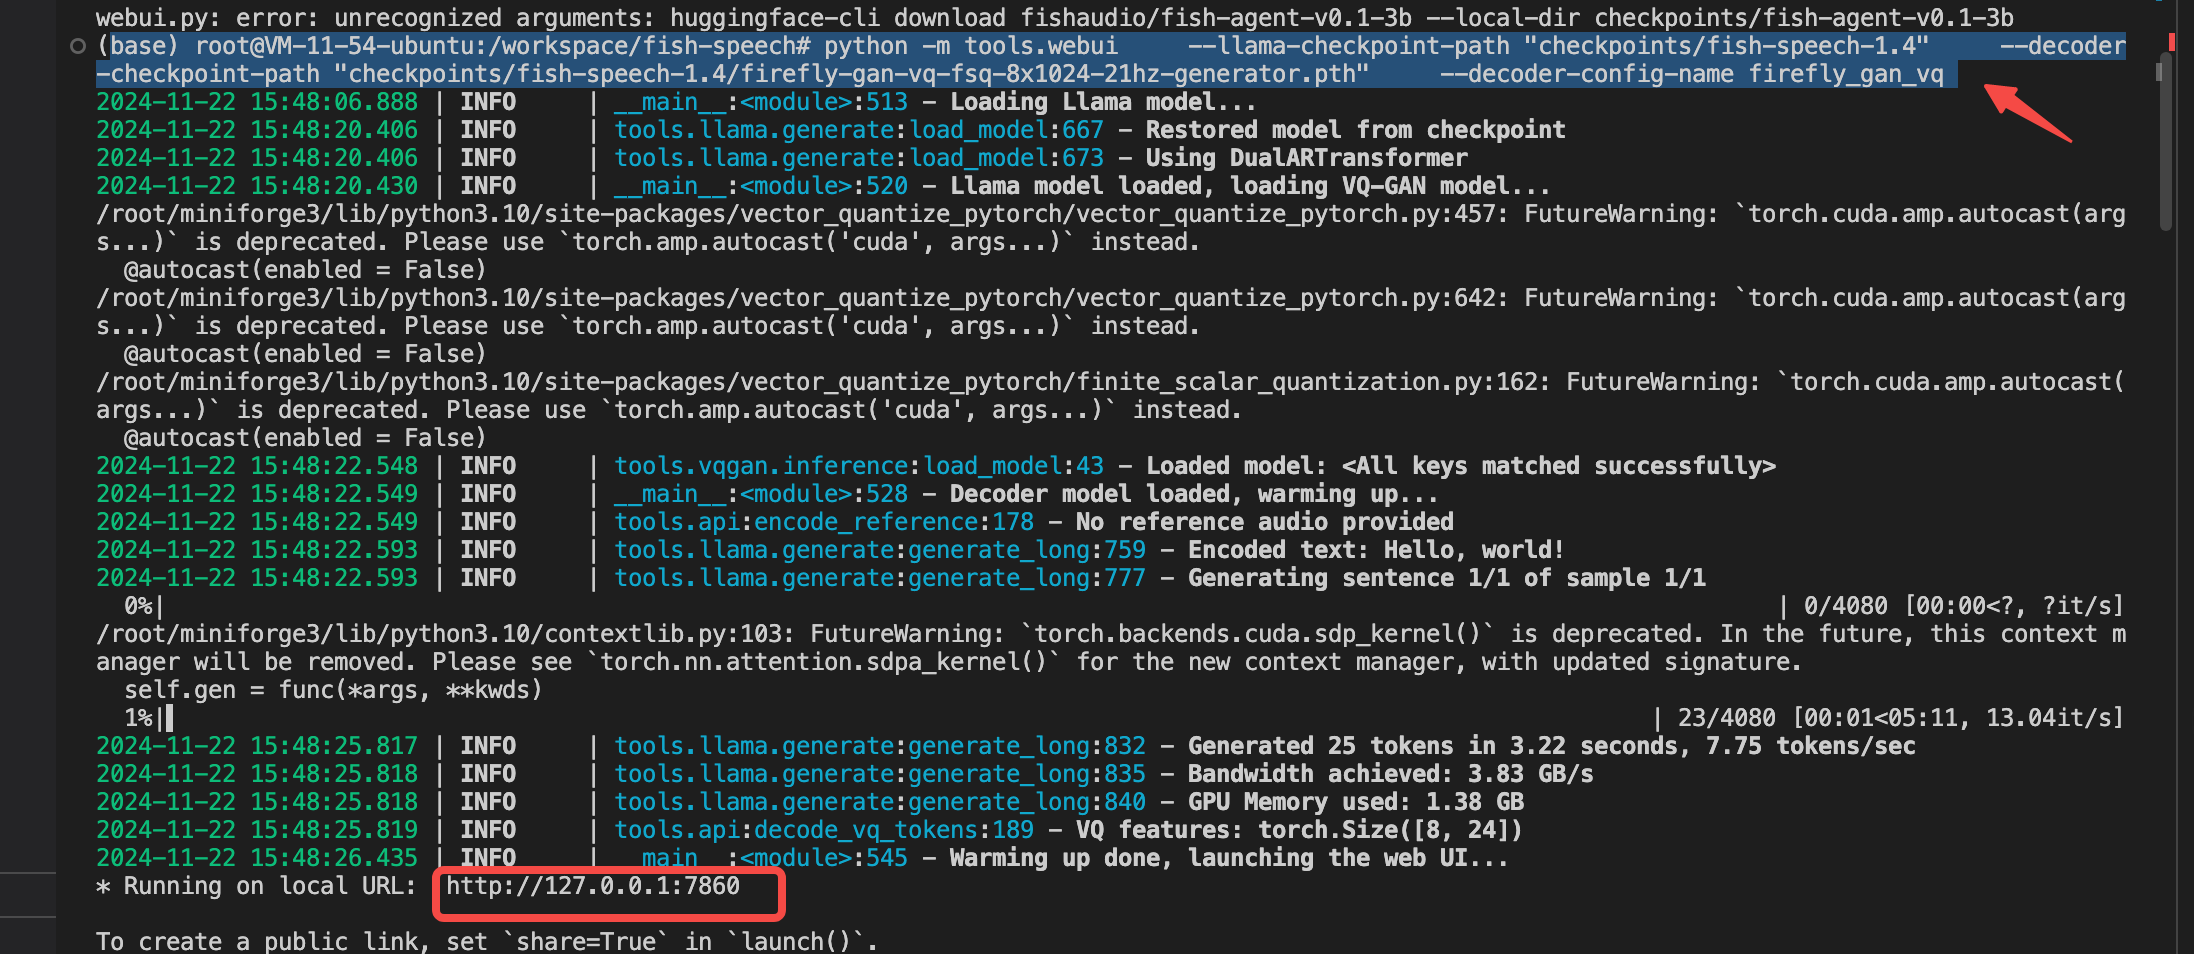
运行webui
命令路径 /workspace/fish-speech下
cd ./fish-speech
python -m tools.webui     --llama-checkpoint-path "checkpoints/fish-speech-1.4"     --decoder-checkpoint-path "checkpoints/fish-speech-1.4/firefly-gan-vq-fsq-8x1024-21hz-generator.pth"     --decoder-config-name firefly_gan_vq
可以看到 http的监听端口为7860
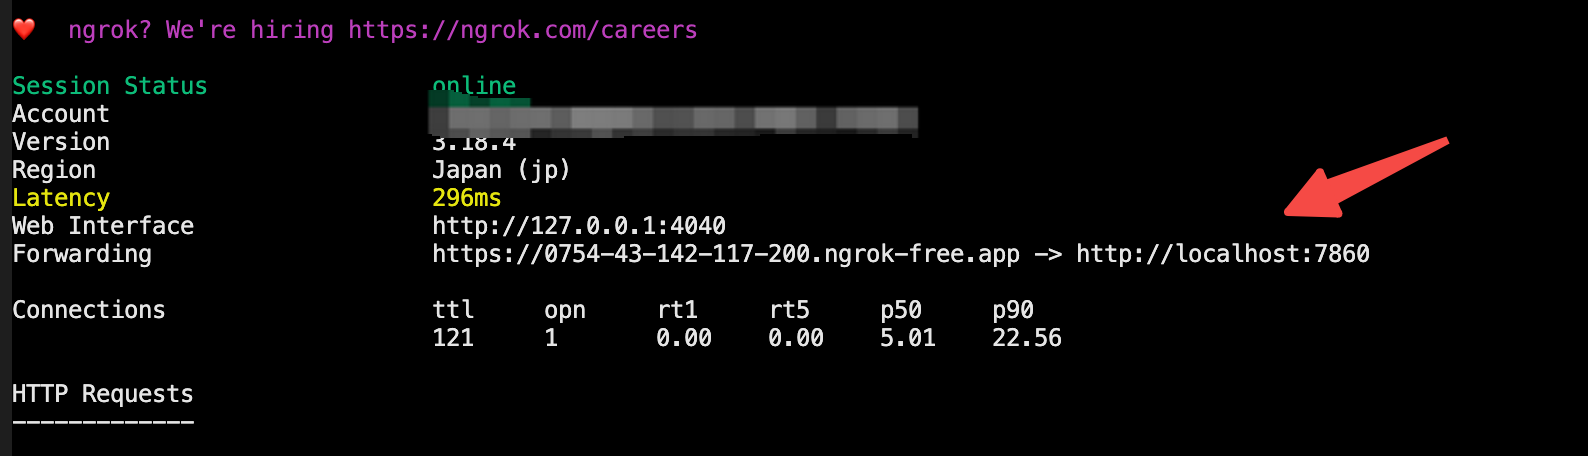
ngork代理
打开 https://dashboard.ngrok.com/get-started/setup/linux
按 Download标签页的流程走
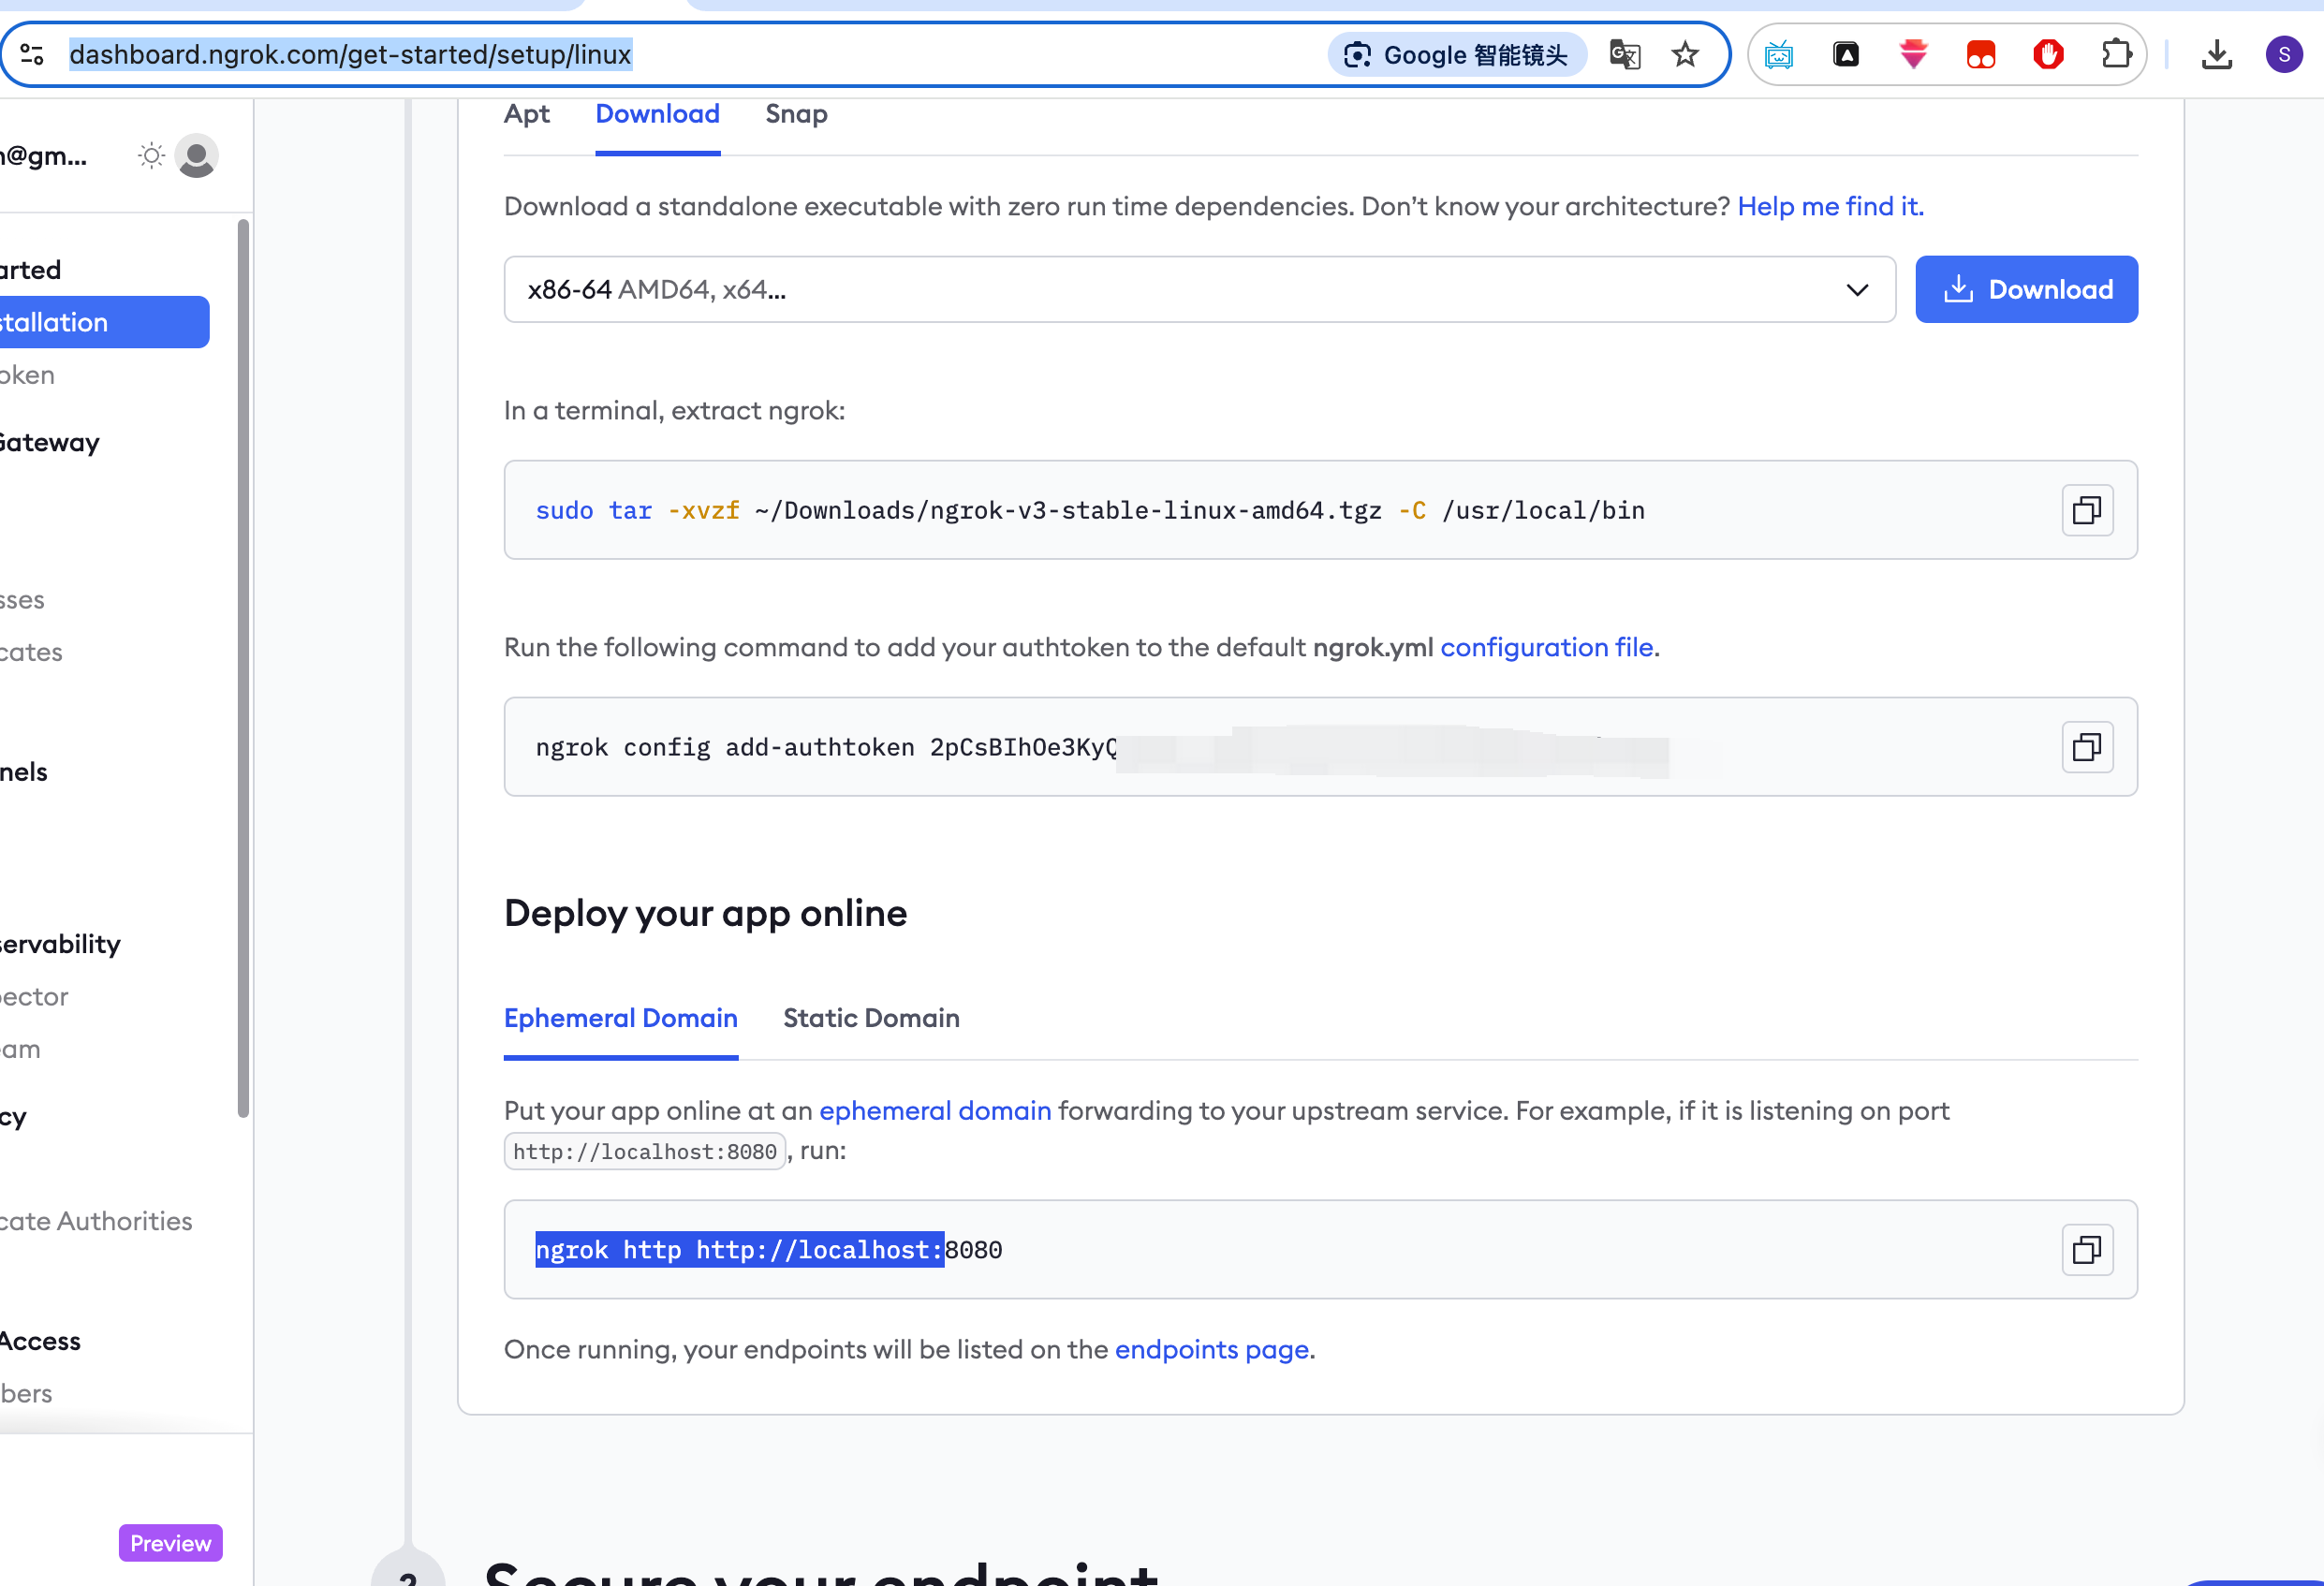
注意最后代理的端口是7860 命令如下
ngrok http http://localhost:7860
最后一步
打开这个*.app链接就能使用啦